Layer basics
Every object you create in bildigo’s viewport is a layer. Rectangles, ellipses, boards or text boxes are layers that you can use to build your design.
Pages
Pages allow you to organize layers into separate sections inside a file, and are shown in separate tabs. Subdividing a file into pages gives you the ability to split your file into logically different sections so that you can organise your work. For instance, you can use pages to separate stages of the design process but keep them in the same document. Different screen sizes, features or atomic design categories are other common ways to use pages.
You can add, remove or rename pages to suit your needs.
Layers panel
Layers: Layers are the different objects that you can place at the design viewport. At the layers panel you can see all the layers of a file page. Drag the layers to arrange them to different positions.
Navigate layers using the keyboard
- Select a layer and press top/bottom arrows while pressing Ctrl/⌘ to move them in the layers list.
- Press tab to change the layer selection to the next layer.
- Press tab + Shift/⇧ to change the layer selection to the previous layer.
- If the layer contains other layers, press Enter to select the first layer inside the group and Enter+ Shift/⇧ to move a level up.
Layers are displayed from the bottom to the top of the layer stack, with layers above on the stack being shown on top in the image.
Hide and lock layers
Click on the eye icon to change the visibility of a layer. Click on the lock icon to lock or unlock a layer. A locked layer can not be modified.
Create layers
To create a layer you have to select the type of layer by clicking the selected tool (board, rectangle, ellipse, text, image, path or curve) at the toolbar. Then you usually have to click and drag your mouse on the viewport.
Hold Shift/⇧ while creating an ellipse or a rectangle to maintain equal width and height.
Duplicate layers
There are several ways to duplicate a layer:
- You can press Ctrl/⌘ + D to duplicate a layer right over a selected layer.
- If you press right click over a selected layer at the viewport or at the layers panel you can use the option at the layer menu.
- You can also select a layer and drag while pressing Alt/⌥ so you can simultaneously duplicate and drag the new layer.
Delete layers
There are a couple ways to delete a layer.
- You can press Supr/⌫ to delete a selected layer.
- If you press right click over a selected layer at the viewport or at the layers panel you can use the option at the layer menu.
Select layers
The simplest way to select a layer is to click on it. Make sure that you have the “move” pointer selected at the toolbar.
To select multiple layers you can click and drag around the layers you want to select. You can also click more than one layer while pressing Shift/⇧. If you hold Shift/⇧ and click you can deselect layers individually.
Selecting layers at the layers panel
- Click a layer to do a single selection.
- Press Ctrl/⌘ while clicking two or more layers to do a multiple selection.
- If you press Shift/⇧ while selecting two or more layers all the layers within the selection area will be selected.
Select layers ignoring groups (deep selection)
If you want to select an element that is difficult to reach because it is under a group of elements, hold Ctrl/⌘ to make the selection ignore group areas and treat all the objects as being at the same level.
Select layers inside groups
To select a layer inside a group you do double click. First click selects the group, second click selects a layer.
Select layer menu
At the dropdown menu (right click on a layer to show it) there's the option "Select layer" that allows the user to select one layer among the ones that are under the cursor's location.
Group layers
Grouped layers can be moved, transformed or styled at the same time.
- Group: To group two or more layers, select them and then press Ctrl/⌘ + G. You can also use the option at the layers menu that you can open with right click.
- Ungroup: Press Shift/⇧ + G or use the option at the layers menu that you can open with right click over the selected group.
Mask layers
A mask is a layer that does a clipping and only shows parts of a layer or multiple layers that fall within its shape.
- Mask layers: Select more than one layer or a group of them. Then you can apply the masking using the option at the layers menu or by pressing Ctrl/⌘ + M. The shape that is at the lowest level at the layer list will be used as a mask.
- Unmask layers: Select a mask and then press Shift/⇧ + Ctrl/⌘ + M or use the option at the layers menu.
Move layers
To move one or more layers on the viewport you have to select them first and then click and drag the selection where you want to place them. You can also use the design panel to set a precise position relative to the viewport or the board.
Resize layers
To resize a selected layer you can use the handles at the edges of the selection box. Make sure the cursor is in resizing mode. You can also use the design panel where you can link width and height.
- Hold Shift/⇧ while resizing the object to preserve its aspect ratio.
- Hold Alt/⌥ while resizing the object to do it from the center and resize simultaneously two opposite sides.
Rotate layers
To rotate selected layers you can use the handles at the edges of the selection box. Make sure the cursor is in rotation mode. If you hold Ctrl/⌘ while rotation the angle will change in 45 degree increments. You can also find this option at the design panel.
Flip layers
You can find the options to flip layers in their contextual menu (select the layer and right click). You also have shortcuts to do this:
- Flip layers horizontally: Select the layer and press Shift/⇧ + H
- Flip layers vertically: Select the layer and then press Shift/⇧ + V.
Scale elements, texts and properties
Activate the scale tool by pressing K or from the main file menu to scale elements while maintaining their visual aspect. Once it is activated you can resize texts, layers and groups and preserve their aspect ratio while scaling their properties proportionally, including strokes, shadows, blurs and corners.
Align and distribute layers
Aligning and distributing layers can be found at the top of the Design panel.
Align layers
Aligning will move all the selected layers to a position relative to one of them. For instance, aligning top will align the elements with the edge of the top-most element.
Distribute layers
Distributing objects to position them vertically and horizontally with equal distances between them.
Search and filter layers
Reach specific layers with a simple search. You can also filter the layers list per layer type (board, group, mask, component, text, image and shape).
Collapse groups and boards
Groups and boards can have their contents expanded and collapsed. Click on the arrow at the right side to toggle the visibility of their contents.
To collapse all the layers, and just display the boards, press Shift/⇧ + left click over the right arrow of a group or a board to collapse them all.
Boolean operators
It is possible to combine shapes in a group in different ways to create more complex objects by using "boolean" operators. Boolean operators are non destructive and the original shapes remain grouped and available for more editing. There are five boolean operations available: union, difference, intersection, exclusion and flatten. Using boolean operations allows many graphic options and possibilities for your designs.
- Union: the resulting combination is the sum of the shapes.
- Difference: the opposite of union, the resulting object has the area of the shape on top has been cut out from the shape at the bottom.
- Intersection: creates a group whose shape is the overlapping area between the shapes.
- Exclusion: the opposite of intersection, the resulting shape is the area that does not overlap between the shapes.
- Flatten: Tecnically not a boolean operator, this is the way to permanently combine the paths of a group of shapes in a single one.
Resizing constraints
Constraints allow you to decide how layers will behave when resizing its container.
Apply constraints
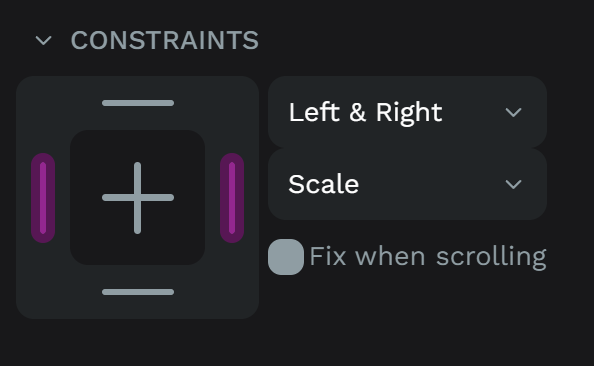
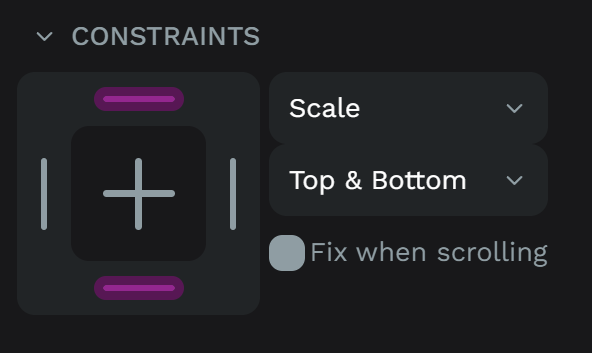
Constraints allow you to decide how layers will behave when resizing its parent container. You can apply horizontal and vertical constraints for every layer.
To apply constraints select a layer and use the constraints map or the constraints selectors at the design panel.
Constraints are set to “Scale” by default, but you have other options.
Horizontal constraints
- Left: The object maintains its size and position relative to the left side of its parent container.
- Right: The object maintains its size and position relative to the right side of its parent container.
- Left & right: The object resizes while maintaining its distance to both horizontal sides of its parent container.
- Center: The object maintains its size and position relative to the horizontal center of its parent container.
- Scale: The object will horizontally resize proportionally to its parent container size.

Vertical constraints
- Top: The object maintains its size and position relative to the top side of its parent container.
- Bottom: The object maintains its size and position relative to the bottom side of its parent container.
- Top & bottom: The object resizes while maintaining its distance to both vertical sides of its parent container.
- Center: The object maintains its size and position relative to the vertical center of its parent container.
- Scale: The object will vertically resize proportionally to its parent container size.

Focus mode
Select the elements of a page you want to work with in a specific moment hiding the rest so they don’t get in the way of your attention. This option is also useful to improve the performance in cases where the page has a large number of elements.
To activate focus mode:
- Select one or more elements.
- Right click to show the menu and select the option "Focus on" or press F.
RTL support
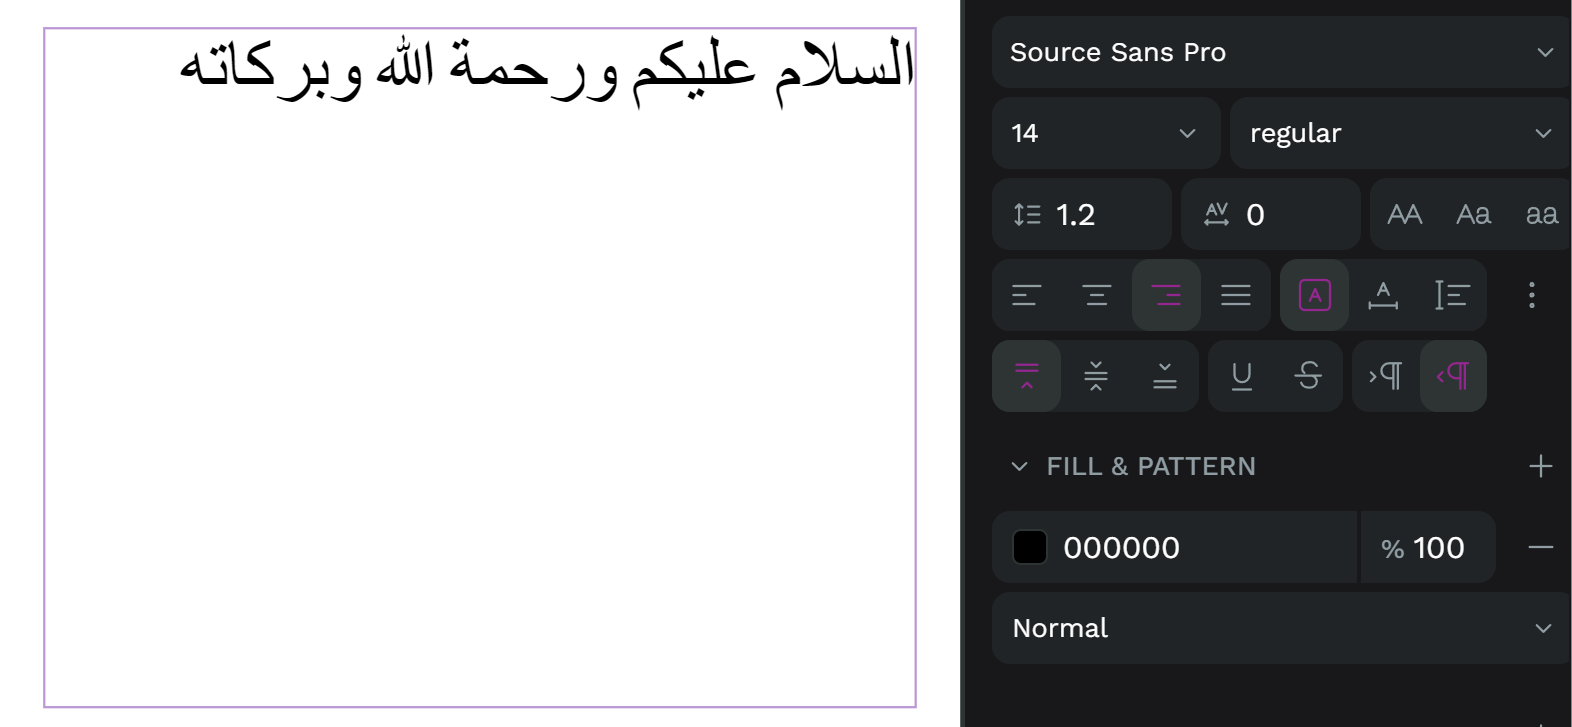
Diversity and inclusion is a major bildigo concern and that's why we love to give support to RTL languages, unlike most design tools.
If you write in arabic, hebrew or other RTL language text direction will be automatically detected in text layers.
